Step-by-Step: Using BlueStacks AppPlayer From Behind a Proxy
Last revision: 15.05.2019
Introduction
BlueStacks AppPlayer is a software that brings Android applications to PCs and Mac. This tutorial will show you how to use BlueStacks from behind an HTTP proxy.
A regular HTTP proxy is sufficient to provide access to the internet to BlueStacks itself and to the most of Android apps. A small amount of Android apps use network protocols other than HTTP and HTTPS. In order to proxify these latter apps, you will need a SOCKS, Shadowsocks or SSH proxy server instead.
The instructions below should apply to Mac OS X too as the setup procedure is very similar.
This tutorial has been written for BlueStacks 4. If you determine that this tutorial is outdated, then please feel free to let us know by sending an email via our contact form.
Installation
Download and install ProxyCap. Restart your system when the setup program asks you to do so.
If you already have BlueStacks installed, skip to the next step. Otherwise, download the BlueStacks installer, then run it and follow instructions to install BlueStacks.
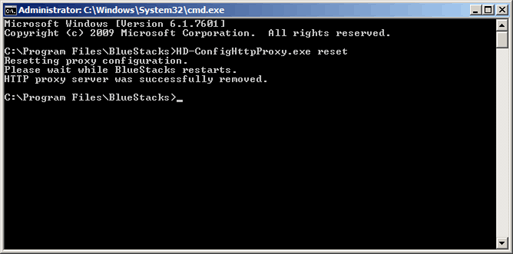
Removing proxy set using HD-ConfigHttpProxy
BlueStacks comes with a command line tool named HD-ConfigHttpProxy.exe which allows users to set a HTTP proxy in BlueStacks. But after using this tool the most Android apps, including Google Play Store, are still unable to connect to the internet.
If you have not set your proxy using HD-ConfigHttpProxy, skip to the next step. If you did, you must remove
the proxy before using ProxyCap. Do that by running the following command from the Windows command prompt:
HD-ConfigHttpProxy.exe reset
Configure ProxyCap to work with BlueStacks (Typical Configuration)
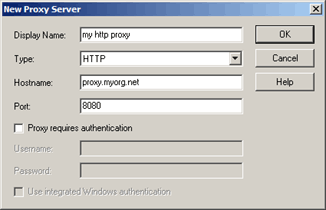
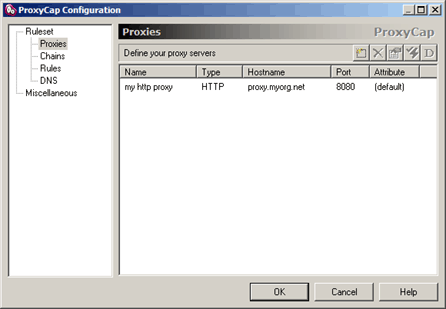
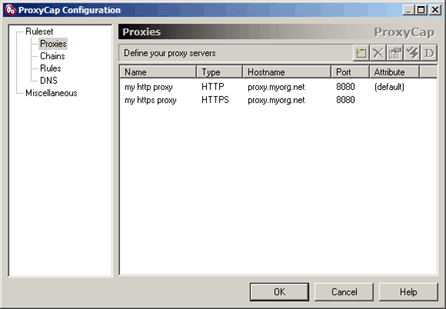
We must define 2 separate proxy servers: HTTP and HTTPS. First let's add the HTTP proxy.
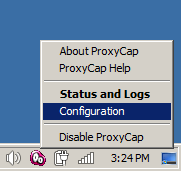
Right click on the ProxyCap taskbar icon and choose Configuration.
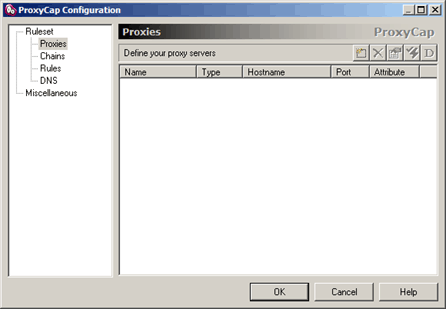
Click the Proxies category.
Press the New  button on the toolbar.
Select HTTP from the Type drop down list.
Fill in the other settings.
Press the OK button.
Now add the HTTPS proxy. Set the type of the proxy server to HTTPS. The server address and the authorization settings should be the same as for the HTTP proxy.
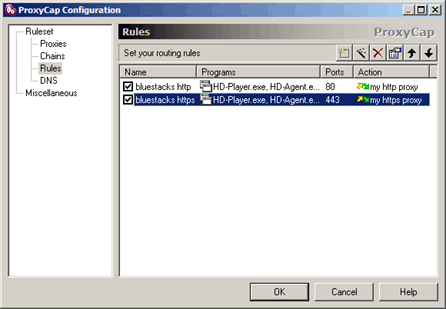
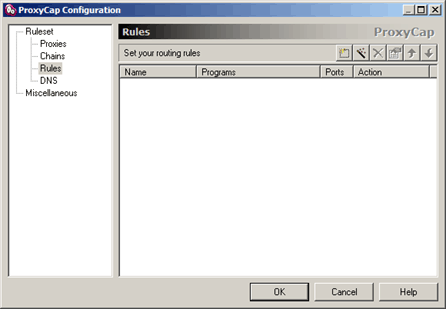
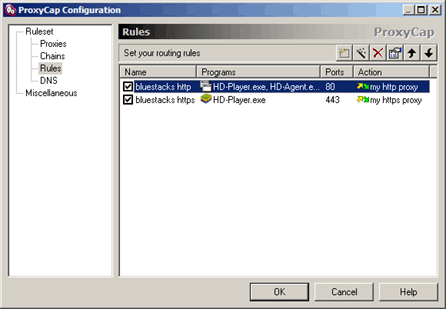
Now let's create ProxyCap routing rules for BlueStacks. We will add 2 rules: one for the HTTP connections and the other for HTTPS.
Click the Rules category.
Press the New button on the toolbar.
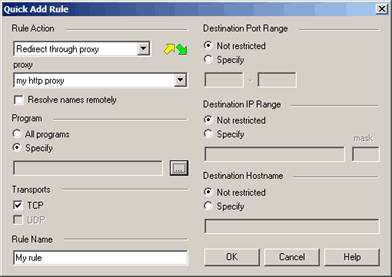
In the Rule Action section, select the display name of the HTTP proxy server from the drop down list.
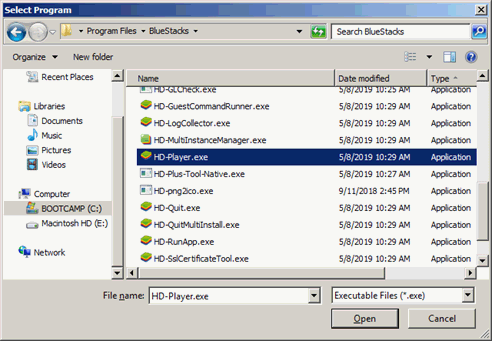
In the Program section, click Specify, then click the Browse  button.
Navigate to the BlueStacks program folder. It is located in Program Files.
Select HD-Player.exe.
Press the Open button.
In the Destination Port Range section, click Specify, then type 80 in the first port field.
In the Rule Name section, enter a display name for the rule.
Press the OK button.


Now add one more "redirect" rule for HD-Player.exe but with the following changes:
1. In place of the HTTP proxy, specify the HTTPS one.
2. In place of the port 80, specify 443.
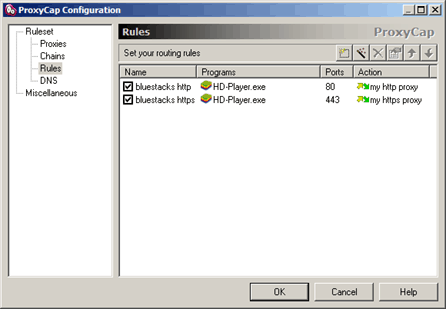
Click OK to save the configuration.
You are done, run BlueStacks and enjoy!
Configure ProxyCap to work with BlueStacks (Extended Configuration)
The above configuration is sufficient if your system uses a proxy server to connect to the internet. Besides HD-Player.exe, there are 2 other BlueStacks program files (HD-Agent.exe and Bluestacks.exe) that require an internet access, but, unlike HD-Player.exe, they respect the system proxy settings. So this extra configuration step makes sense only if your system does NOT use a proxy server.
Select the first entry in the rule list.
Press the Properties  button on the toolbar.

Select the Programs tab.
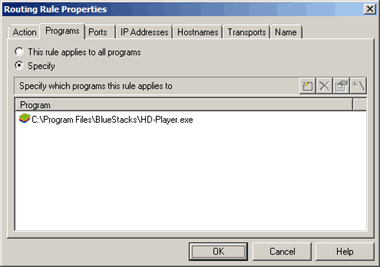
Add HD-Agent.exe and Bluestacks.exe to the Program list. HD-Agent.exe resides in the same folder as HD-Player.exe. Bluestacks.exe is located in the Client subfoder of the BlueStacks program data folder (C:\ProgramData\BlueStacks\Client). The Windows ProgramData folder is hidden by default. To open this folder in the Select Proxy dialog box, enter its path (C:\ProgramData) in the address bar at the top of the dialog box.
Press the OK button.
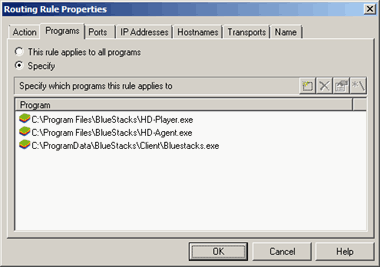
Repeat the procedure above to add HD-Agent.exe and Bluestacks.exe to the Program list in the second rule.